Pages

Showing posts with label Baked Goods. Show all posts

Saturday, December 3, 2011

Recipe Review: Pumpkin Cupcakes


Source: Vegan Cupcakes Take Over the World by Isa Chandra Moskowitz and Terry Hope Romero

I think I have had an unconscious obsession with orange food this fall based on how many orange dishes I have made. Or, the most likely case is I like to base my meals around the brightest, most colorful produce of the season I can afford, which in the fall means many of my veggies will be orange.

A friend who eats vegan deserts due to food allergies shared this recipe with me. I love recipes like this because all of the ingredients are already in my pantry, except the milk but there are many options for this. To keep the cupcake dairy-free use soy milk or a nut milk. Other substitutions include fruit juice, apple or orange would be tasty, or water. In my vegan baking experiments, I have occasionally used water instead of milk but I think the milk results in the best product. In my case, I may not always have dairy milk on hand but I always have half-and-half for my coffee. In a bind, I use equal parts half-and-half and water.

The wet ingredients.
I have made this recipe three times with yams instead of pumpkin and loved every batch. To do this, I pricked a fresh yam several times with a fork, cooked it in the microwave until done (the amount of time needed varies with the size of the yam), and let it cool until I could remove the skin. I then mashed the yam with a potato masher. I used 1 cup of mashed yam in the recipe and held onto any leftovers for a different use.

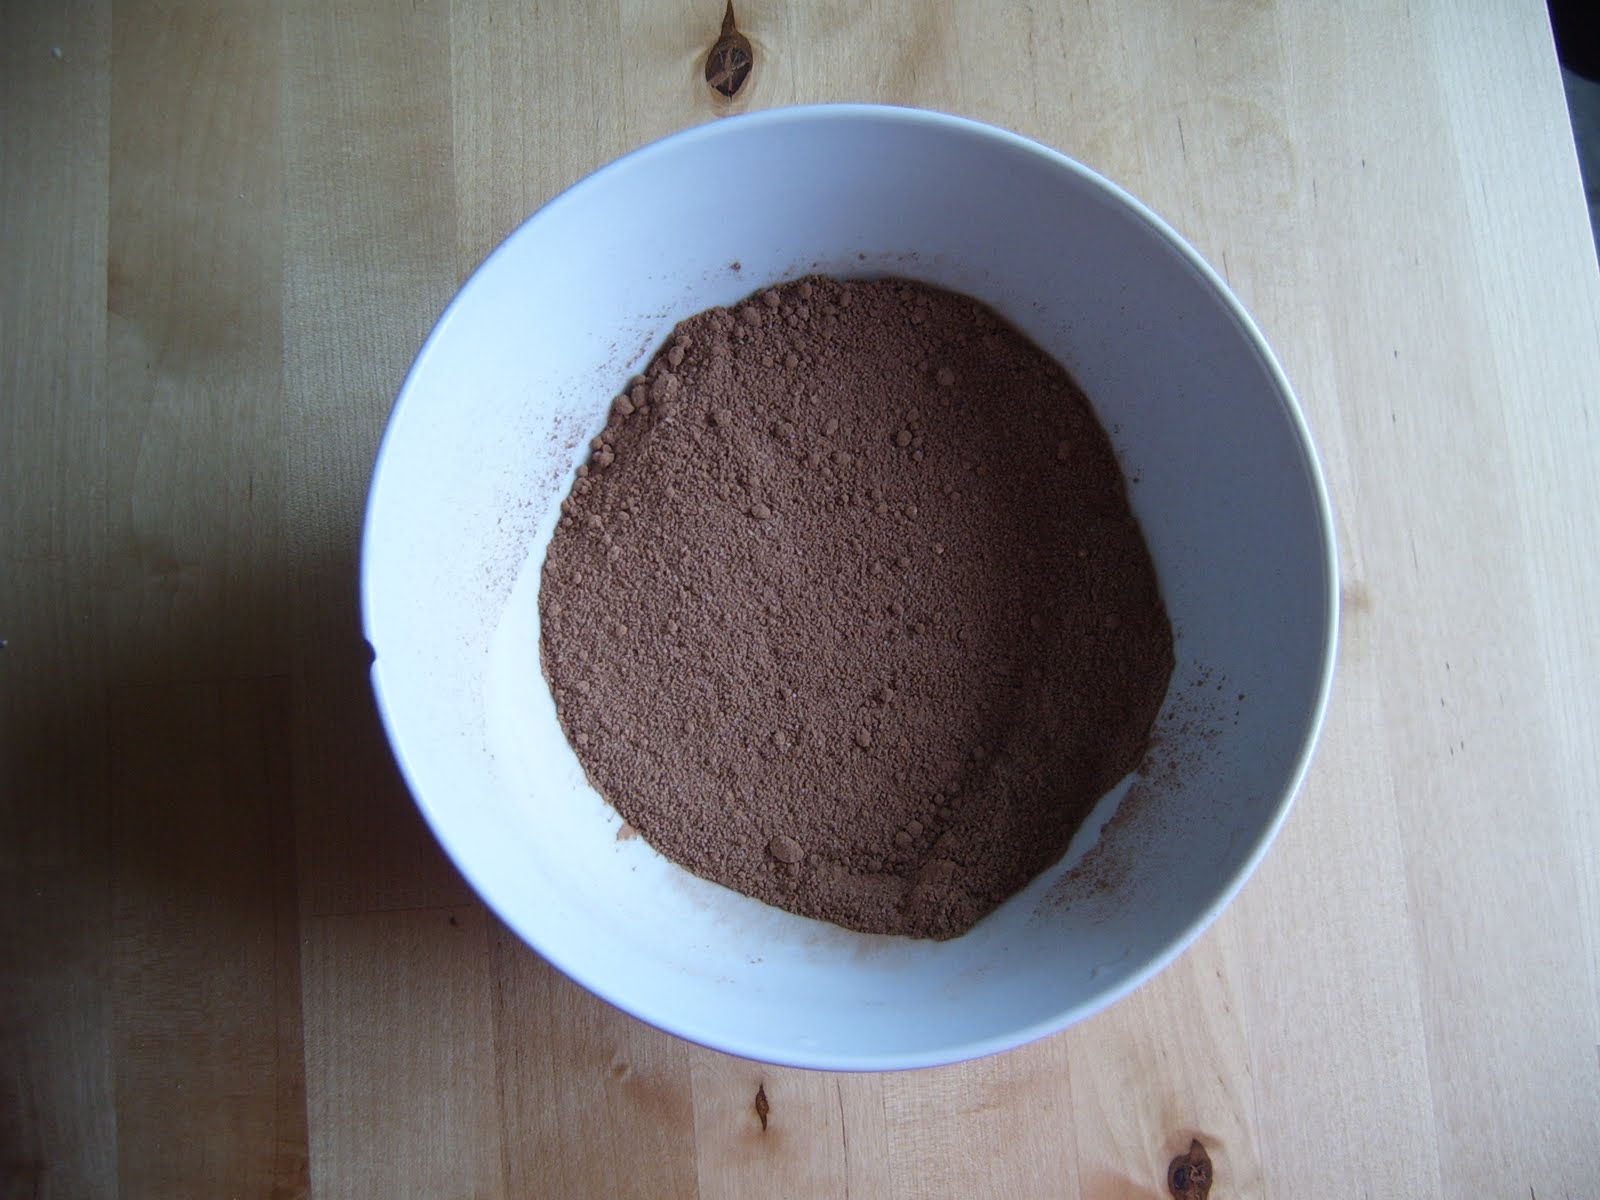
The dry ingredients. From top left going clockwise: cinnamon with nutmeg, baking soda, baking powder, salt, whole-wheat flour, and all-purpose flour.

Z. hates yams so he has not tried these cupcakes. He suggested I try substituting the yams with white potatoes. Making potato cupcakes will be my next culinary adventure. Potato donuts are amazing so potato cupcakes should be great, too.

I have included the recipe for my slight adaptation of the Vegan Cupcakes Take Over the World Recipe. * is placed next to each ingredient that I have adapted or changed. Also, I did not include the recipe for the frosting recipe. I think this cupcakes are delicious and perfectly sweet without. You will have to get their book to find the recipe. Enjoy!

Yam Muffins, adapted from Vegan Cupcakes Take Over the World by Isa Chandra Moskowitz and Terry Hope Romero

1 cup cooked mashed yam *
1/3 cup canola oil
1 cup sugar
1/4 cup milk
1 teaspoon vanilla
1 1/4 cups all-purpose flour or 3/4 cup all-purpose flour plus 1/2 cup whole-wheat flour (my preference!)
1/2 teaspoon baking powder
1/2 teaspoon baking soda
1 teaspoon cinnamon *
1/2 teaspoon freshly grated nutmeg
1/4 teaspoon (I suggest 3/8 teaspoon) salt
  1. Preheat oven to 350 degrees Fahrenheit. Line muffin pan with liners or spray with non-stick cooking spray.
  2. In a medium bowl, stir together mashed yam, oil, sugar, milk, and vanilla.
  3. In another bowl, combine the remaining ingredients. Sift the dry ingredients into the yam mixture. Stir until combined.
  4. Fill each muffin about 2/3rds full. Bake about 22-24 minutes, or until done.

Friday, October 28, 2011

Apple Sauce Bread...Ace's Banana Bread Revisited


It was a recent lazy Sunday morning that I really wanted some of my homemade banana bread. The problem was I did not have bananas or canola oil. And, I really did not want to leave the apartment. I realized I may already have everything I needed to make a loaf of bread.

A few months ago I had stocked up on some applesauce with the intention of vegan baking. I knew that I could probably use the applesauce in place of the bananas with no problem. I like to use 3 bananas in my bread, which is about 1 cup smashed. I used 1 cup of applesauce in its place.

Turns out, the apple sauce made a great substitute. The apple sauce provided a mild apple flavor that was barely noticeable. For those who hate the flavor of bananas, like Z., this is a nice compromise.

I only had the issue of no oil to deal with. I have tried making my banana bread several times with yogurt in the past. I had used regular, low-fat yogurt. I was not entirely pleased with the results. The bread needed a longer cooking time due to the watery yogurt, resulting in a tough crust. My attempts at changing the amount of yogurt was not successful.

I had a container of Greek yogurt I had been holding on to for cooking purposes. Greek yogurt is a very recent discovery for me (I first tasted Greek yogurt in the last year or so). I love the stuff. Greek yogurt is incredibly thick and creamy, even the low-fat versions feel decadent.

I used 1/2 cup of Greek yogurt (the same amount of oil I would have used) and was very happy with the results. I did not notice a difference in the cooking time or the moistness of the bread.

I made one more change to this bread: I added 1/2 cup oats to the batter and sprinkled about 1/8 cup oats on top of the bread. I am kicking myself that I had not tried this sooner. I already love adding a few oats to my pancakes because they add a slight nutty chewiness to the texture.

I was surprised at how much spiced this bread needed; I did not realize how much flavor the bananas added. I included cinnamon and a pinch of cardamom in the bread. Grated nutmeg or pumpkin pie spice would be a great addition. Just a friendly reminder because I may have failed in this regard, make sure to add enough salt. Enjoy!

Sunday, October 9, 2011

Vegan Acorn Squash Pie

It even looks like a real pie!
I have a fascination, nearing the border of obsession, with vegan baking. I love reading about and looking over recipes for vegan baked goods. I have only known deserts like pies and cookies and muffins to be loaded with eggs and butter or other tasty ingredients. I am intrigued by the alternatives, not because I am vegan, I am excited that there are other ways to accomplish desert.

Last week, acorn squash were $0.50 EACH at one of the markets in town, so of course, I bought 4. I had no idea what I was going to do. I made three dishes that I will be sharing, one of which was pie. I was very skeptical about using acorn squash to make what I have always known as pumpkin pie but now I am a believer.

Seriously, this was the best pumpkin pie I have ever eaten. I hope my Grandma S., my dad's amazing mother who is famous for her pies, never reads this. Using her phrase, she would slap me silly. I am not the only one who thinks so. Z. is out of town so I had two of our friends over for dinner and they loved this pie!

This is all that remains after a delicious meal with friends
I think there are a few reasons why this pie is so good. The first is the flavor. I love pumpkin pie but I think acorn squash has a lot more flavor. This is my first pie made from fresh squash and my life will never be the same. I had no idea that using fresh squash would make such a difference. Preparing the fresh squash did not take nearly as much effort as I thought. The squash was so tender after roasting that after removing the flesh from the skin, I was able to use a potato masher to mash the pumpkin to the proper consistency rather than going to the effort of processing the squash in the food processor.

After roasting some acorn squash for dinner the other night, I realized this squash is incredibly sweet so the pie did not need very much added sugar. This let the flavor of the squash be the star of the pie. The lack of eggs also helped the flavor of the squash shine through. There was nothing in the pie to temper or hide the flavor of the squash.

The ingredients

While researching pumpkin pies, I learned that because this is a custard pie that a crust is not necessary. I just did not feel like making a crust and I could not bring myself to buy a prepared crust from the store. One of the crust-less pie recipes suggested adding apple slices to add substance. I picked an apple variety that I knew to be slightly tart when raw so it would not be overwhelmingly sweet when baked. The apples were a hit!


Ready to go into the oven.


If nondairy milk is something you do not normally drink, there are a few alternatives. Regular milk would be just fine as long as you are not sharing this pie with a vegan. Or, in my case, I purchased a single-serving 8 ounce box of vanilla soy milk.  I really wanted to add vanilla but did not have any in the pantry so the vanilla soy milk did double duty.

I have no idea where this recipe first appeared. While searching, all of the recipes for vegan pumpkin pie without tofu were variations of this recipe. I found the recipe in the Vegetarian Times archive, as well as numerous blogs, like here, here, and here. After reading some of the comments, I was concerned that my pie would not be set up enough after only spending a couple of hours in the refrigerator, so I only added 1/2-3/4 cup of soy milk. I was very pleased with the result. The other change I made to the original recipe was to reduce the amount of sugar. I added 1/2 cup granulated sugar. This was the right amount for myself and my guests. Enjoy!

Crust-less Acorn Squash Pie

1/2-1 apple, such as a Fuji or Granny Smith, peeled, cored, and cut into wedges
2 cups pureed acorn squash *
3/4 cup non-dairy milk, such as soy milk
1/2 cup sugar
1/4 cup cornstarch or arrowroot powder
1 teaspoon vanilla (or omit and use vanilla soy milk)
1/2 teaspoon salt
1 teaspoon ground cinnamon
1/2 teaspoon pumpkin pie spice
  1. Preheat oven to 425 degrees F. and spray a pie pan with non-stick cooking spray.
  2. Place apple slices in a single layer in the bottom of prepared pie pan.
  3. In a large bowl, combine all ingredients until smooth and blended. Pour mixture over apple slices carefully and smooth top.
  4. Bake 10 minutes.
  5. Turn oven temperature down to 350 degrees F. Bake until filling is set, about 50 minutes.
  6. Cool on wire wrack then cool in refrigerator at least one hour. May be made a day ahead and refrigerated overnight.
* To prepare squash, preheat oven to 400 degrees F., cut in half, and scoop out seeds. Place squash halves on an oiled baking sheet. Bake 30-40 minutes, or until very tender. The skin comes easily when the squash is cool. Scoop out flesh and either process in a blender or food processor until smooth, or smash with a potato masher until smooth.

Thursday, August 25, 2011

Fudgy Meringue Cookies Revisited


I am happy to report that I made cookies successfully! I have not been able to get the terrible Fudgy Meringue Cookies I made out of my head. These cookies had such potential; they required minimal ingredients, much of which came from the pantry. I gave these cookies another try and had some success. My cookies still did not resemble the gorgeous cookies pictured by the magazine but they sure tasted great. Here are a few things I did differently:
  • I used a hand-mixer. I have the best boyfriend ever who gave me the hand mixer I have had my eye on for months and months. The first time around, I thought I was being resourceful when I used a whisk and attempted to make meringue by hand. 
  • I used three egg whites rather than two egg whites. The first batch was dry and lumpy but this time the batter was smooth and looked like meringue!
  • I did not add the melted chocolate. Z. and I thought the melted chocolate was slightly too much the first time. The next time I make these cookies without the melted chocolate, I will be adding a little extra flavor with some instant espresso powder. I thought the cookies were great without the extra chocolate but a little extra pep will not hurt anything.
  • I did not burn the cookies!
I still did not use powdered sugar. I tried running some through my little food processor but it made a terrible screeching sound with only a little sugar in the container. The granulated sugar seemed to work find. I just made sure to add the sugar to the egg whites in small batches. The moral of this story: Try, try again and you just might get cookies. Enjoy!

P.S. Eggs are on my list of expensive items. I love the idea that I can a portion of an egg in this recipe and use the rest in another recipe. 

    Wednesday, July 20, 2011

    Recipe Review: Zucchini Muffins

    Source: Cooking Light June, 2009

    I do not have a zucchini bread recipe in my arsenal so I decided to review a few different recipes. This first recipe came from an old issue of Cooking Light. What drew me in was the cheapness. When I determine how cheap a recipe is on the Cheap not Frugal Eats scale, I look at a few specific ingredients. I know I have discussed this before but I will lay out my thoughts more clearly this time:

    Common Ingredients Found in Baked Goods that Do Not Pass the Cheap Not Frugal Eats Test:
    • butter
    • milk
    • eggs
    • oil
    • honey
    • dried fruit
    • nuts
    Common Ingredients Found in Baked Goods that Do Pass the Cheap Not Frugal Eats Test:
    • flour
    • spices (due to the amount of spice needed to get a lot of flavor is so small I put spices on this list)
    • fresh vegetables and fruit (on sale!)
    • and Ingredients that Do Not Pass the Cheap not Frugal Eats Test in moderation 
    Do not get me wrong, I will more than happily consume anything with any of these ingredients. In my own cooking and baking, I try to limit the amount of ingredients I use that do not pass my cheap-ness test.

    Back to the recipe. If you have not yet noticed, I am really dense and do not notice similarities until after I have made the recipe. I realized after making the dish that I have used this recipe before, just under a different name. This happened with these zucchini muffins and with my Honey-Sesame Dressing. I have baked Garam Masala Carrot Muffins using an almost identical recipe, which I thought was clever and had adapted all on my own. I admit, I will be trying the ratio of leavening in the zucchini muffin recipe next time I make my carrot muffins.

    Well, if you are looking for an easy, plain (in a good way) zucchini bread or muffin, I would suggest this recipe. I had plenty of freshly grated nutmeg. After many batches of granola and this recipe, I am finding the key to yumminess in this household is nutmeg. The recipe had you sprinkle a little cinnamon-sugar with nutmeg in my case, over the top of the muffins. I would not have thought of this small touch, which turned out very nice. Enjoy!


    Zucchini Muffins

    1 cup whole-wheat flour
    2/3 cup all-purpose flour
    1/2 cup sugar
    1 teaspoon ground cinnamon
    1 1/4 teaspoons baking powder
    1/2 teaspoon baking soda
    1/4 teaspoon salt
    1 1/3 cups shredded zucchini (about 2 small zucchini or 1 large Italian zucchini)
    1/2 cup fat-free milk
    2 tablespoons canola oil
    2 tablespoons honey
    1 large egg
    1 tablespoon sugar
    1/4 teaspoon ground cinnamon
    1. Preheat oven to 400 degrees Fahrenheit. Spray muffin tins with cooking spray. Set aside.
    2. Combine the first seven ingredients (the dry ingredients) in a bowl. In a separate bowl, combine the wet ingredients, or zucchini, milk, oil, honey and egg. Add milk mixture to flour mixture and combine until just mixed. Spoon batter into muffin tins.
    3. Combine the remaining 1 tablespoon of sugar and remaining cinnamon; sprinkle over the tops of muffins. 
    4. Bake for 15 minutes or until golden. Remove from pan and cool on rack.
    Tips:
    • Add nutmeg!
    • I left out the honey but I am sure it is a nice addition.
    • I substituted water for the milk. I was worried because I know the milk helps make for a more tender muffin. The substitution was no problem. If you do not drink milk, you could use fruit juice, water, or a milk substitute.

      Monday, June 27, 2011

      fruit crisp


      I am on a mission to become a better cook and that sometimes mean experimenting and trying out new recipes. Even though I make some dumb mistakes sometimes (like over-baking cookies!), I still want to share what is going on in my little kitchen.

      This is where Cobbler Attempt #1 comes in. When having guests over for dinner, I prefer to make a baked desert. One, this means I will not be eating a whole desert by myself and two, baked goods are warm and inviting. Z. and I had another couple over for dinner the other night. Z. made his super yummy yakisoba and I tried contributing an apple cobbler.

      I think it is time to expand my horizons. I have made my fair share of fruit crisps but never a cobbler. The only difference I can tell between a cobbler and a crisp is the topping. Cobblers have more of a biscuit or pie-type crust and a crisp has a crumbly topping.

      My first try at a cobbler turned out alright, I learned a few things about making a cobbler crust and encountered a few questions but first the recipe I used this time.

      Apple Cobbler, adapted from The Cobbler Crusade by Irene Ritter

      Filling (or the bottom layer):

      2 to 3 apples, peeled and sliced
      3 tablespoons sugar
      1/2 teaspoon cinnamon
      pinch of salt
      1/2 cup warm water or apple juice
      1 tablespoon corn starch
      1 tablespoon canola oil or butter cut into small pieces

      Biscuit Crust:

      1-1/2 cups all-purpose flour or a combination of all-purpose flour and whole wheat flour
      2 teaspoons baking powder
      1/4 cup granulated sugar
      1/2 teaspoon cinnamon
      1/4 teaspoon salt
      1/4 cup canola oil (if using oil, may need 1-2 tablespoons water) or 1/2 cup milk (suggested)
      1. Preheat oven to 425 degrees Fahrenheit and spray a 9-inch square baking dish with non-stick spray.
      2. In a large bowl, combine the sliced apples, sugar, cinnamon, and salt. Make sure apples are thoroughly coated. Pour apples into prepared baking dish. Set aside.
      3. In a small bowl combine 1/2 cup warm water or apple juice with 1 tablespoon cornstarch. Mix thoroughly. Pour into baking dish with apples.
      4. Drizzle oil over top of apples or scatter pieces of butter over apples. Set aside.
      5. In another large mixing bowl, combine all the crust ingredients until well mixed.
      6. Spoon dough on top of apple filling, covering the apples.
      7. Bake 20 to 25 minutes, until crust is done. Serve warm or room temperature.
      Apples!
      Filling ingredients minus cornstarch and water
      Whole-wheat flour (left) and all-purpose flour (right)
      The rest of the topping ingredients

      Changes I will be making to Cobbler #2:
      • As I was eating my cobbler, I was pondering how nice thick slices of apple would have been. I realized when making a fruit crisp I have always cut my apples or pears very thin and peaches rather thickly to enjoy their succulent flesh. Why not cut thick slices of apple?
      • I used equal parts all-purpose flour and whole-wheat flour. The recipe I was using told me to look for a golden topping but in my experience, whole-wheat flour does not change color the same way white flour does. I could have taken the cobbler out of the oven after 20 minutes and had a lovely and fully cooked beige topping. Alas, I second-guessed myself and left the cobbler in the oven for 4 more minutes. The crust was fine, just not as perfect as I would have liked but the next day, I did not notice the over-doneness at all when eating the leftovers.
      • The Cobbler Crusade said I could use 1/4 canola oil to bind the topping ingredients together. Great because I did not have milk! The mixture was very dry and not clumping so in a slight panic I added 1-2 tablespoons of water. I will have to investigate this further but I do know that the milk would help make a flakier crust. There are pros and cons to both.
      • I am a dork and made the crust completely even. When the recipe mentioned creating a cobblestone effect with the dough, I got a little lost. I have seen cobblers before and happily eaten them but are those separate islands of biscuit the cobblestone effect?
      • Any tips or suggestions to aid me in my own cobbler crusade?

        Monday, June 13, 2011

        Recipe Review: Fudgy Meringue Cookies

        Source: Bon Appétit, March 2011 


        Before I get to the results of this recipe, I have to share a little of my feelings towards baking cookies. Z.'s mom and grandma make two totally different chocolate chip cookies that are the best chocolate chips cookies in the whole world and on top of that, Z.'s grandma also makes an amazing plain cookie, her own invention, similar to a shortbread cookie. I have no hope and no desire to compete. Even if I learned how to make a cookie like these lovely ladies, my cookie would still not be good enough simply because my cookie was not made with their hands.The best my humble chocolate chip cookie could hope for would be, "These are alright, I guess... I am a connoisseur of the chocolate chip cookie, after all. What I know? I only have the best chocolate chip cookies at my disposal..." and on and on. I would never hear the end of how my cookies did not measure up to Z.'s cookie standards. Let's not mince works: Z. will be as obnoxious as possible in letting me know how my chocolate cookies have failed. If I want to bake cookies, I need to find and try new recipes that are not chocolate chip cookies.

        The photograph of this cookie had me instantly hooked. Then, I read the recipe and it passed the Cheap Not Frugal Eats test: How much are the ingredients going to cost Z. and are the ingredients in the pantry? Hmmm...Pass!

        Sometimes my cooking attempts at recipes fail, luckily they are still edible...most of the time. My first attempt at Fudgy Meringue Cookies is what I call a learning opportunity. I did almost everything wrong, just to be sure it made a real difference in the finished product. I should clarify. I really, really thought these cookies sounded great, I had the ingredients but I did not follow the directions exactly. Imagine that! The directions really mattered when baking.

        Here is a rundown of the changes I made and the effects in the cookie:

        • The recipe calls for powdered sugar. I used regular, granulated sugar in its place. Chef Steph, Pastry Chef Extraordinaire, has told me that I can make my own powdered sugar in a food processor at home. I was being lazy and thought I would try granulated sugar. The granulated sugar was too heavy. Definitely use powdered sugar!
        • I only needed two large egg whites to make these cookies. I thought my eggs were large but once the two whites were in the bowl, it did not seem like much. At the time, I contemplated adding a third egg white. Next time, I might add a third egg white if it seems like my eggs are on the small side.I do not have an electric mixer so I used a whisk. I probably did not whisk the meringue enough nor reach the proper consistency. I will wait to make these cookies until I have an electric mixer.
        • I did not use the cream of tartar. I thought it would not be a big deal. I did a little more research and learned that cream of tartar helps stabilize egg whites, and increases their heat tolerance and volume. I do plan on trying this recipe again, it was so tasty. I should be able to purchase just a little from the bulk spice section at the Market of Choice. Even though it costs more, if I plan on using a small amount in one or two recipes, I like to get spices or additives from the bulk section.
        • I committed the ultimate cookie sin: I over-baked my cookies. I did follow the directions about the placement of the wire racks and switching the pans at the precise moment. The recipe says the cookies will be cracked and dry looking. My cookies were rather strange looking to begin with, once they were baking, I could not tell if they were done or not. I kept them in the oven a couple minutes too long.
        I thought these cookies were very tasty and if I had the correct ingredients and equipment, this would have been a great recipe. I will be making this again when I can follow the directions exactly.

        P.S. I may tease Z. incessantly and share some of his more charming moments but he makes me feel like the most special person in the whole wide world!

        Tuesday, December 21, 2010

        Recipe Review: Raspberry Oatmeal Bars

        Source: Vegetarian Times, 7/08
        Tastiness: Super Tasty!
        Make Again: Definitely 

        Z and I were having a bunch of people over for dinner, so I decided to try these bars. By the way, here is a link to the recipe. I think they went over well. I love baked goods with oatmeal. I think it's always tasty but oats are cheap and always in our cupboard. I am sure I added more than 1 teaspoon of cinnamon. I also added a little cardamom, since I have it and I love how it tastes. I would make these even if I didn't have jam, they were that good. Try making these!