During a trip to the supermarket last night, I found pineapple on sale for $1.50 each. Of course I bought three. Well, today, they are now on sale for $1. Expect a few pineapple recipes in the near future. I have a couple already in mind!
Showing posts with label Fruit. Show all posts
Sunday, June 2, 2013
Monday, June 18, 2012
Recent Favorite Recipes
Z. and I have been making Pineapple-Coconut Smoothies for a few months now. We love the cold, fruity flavor at the end of the day, waiting for the cool ocean air to make its way to the valley and chill the air. Just keep in mind, the following recipe makes enough for 2 people.
Variation: Add 1/2 cup yogurt to the blender.Yum!

A second recipe Z. and I have enjoyed recently is Marinated Cauliflower Salad with Chickpeas, which was inspired by our Pasta Salad. One of my favorites parts of this salad is the transformation of some of the vegetables, like cauliflower. With a little time marinating, the cauliflower becomes more tender.
Variation: Turn this side dish into a meal by combining 1 cup of salad with some bean thread noodles. Healthy and delicious!
Enjoy!

Variation: Add 1/2 cup yogurt to the blender.Yum!
Pineapple-Coconut Smoothie
by Ace Nation
Keywords: blender pineapple coconut milk
Ingredients (serves 2)
- 1 tray of ice cubes, about 2 cups
- 1 cup pineapple juice, or 1 can Trader Joe's pineapple juice
- 1 cup light coconut milk
Instructions
Place all ingredients in a blender.
Process until smooth.
Serve immediately.
Enjoy!
Powered by Recipage
A second recipe Z. and I have enjoyed recently is Marinated Cauliflower Salad with Chickpeas, which was inspired by our Pasta Salad. One of my favorites parts of this salad is the transformation of some of the vegetables, like cauliflower. With a little time marinating, the cauliflower becomes more tender.
Variation: Turn this side dish into a meal by combining 1 cup of salad with some bean thread noodles. Healthy and delicious!
Enjoy!
Marinated Cauliflower Salad with Chickpeas
by Ace Nation
Keywords: raw gluten-free vegan beans/lentils cauliflower
Ingredients
- 1/2 head cauliflower, chopped into bite-size pieces
- 1 celery stalk, diced
- 1/4 red onion, diced
- 1 15 ounce can chickpeas, rinsed and drained
- 1/3 bunch cilantro, chopped
- 1/4 cup white balsamic vinegar
- 2 tablespoons extra virgin olive oil
- Kosher salt, to taste
- Red pepper flakes, to taste
Instructions
Combine all ingredients in a large bowl. Allow to marinate int he refrigerator for at least one hour.
Enjoy!
Powered by Recipage
Thursday, September 1, 2011
Ace's Adventures with . . . Brown Lentils
During my time of lentil/Waldorf salad reflection, I was looking through Alicia Silverstone's The Kind Diet (which by the way has a number of awesome recipes which I will duly review) and she includes a recipe for lentils with raspberries and orange juice among other ingredients. Maybe my lentil and grape idea was not so far-fetched after all.
Having never had lentils and fruit together before, let me tell you, I have been missing out! I am sure Puy lentils would be even better but I used homely brown lentils. Brown lentils have a mellow earthiness that complemented the sweetness of the fruit. The depth provided by toasting the walnuts and their nuttiness was an excellent addition. Shallots are just plain delicious and complement almost everything and added a savory component. I cannot describe the flavor of a shallot. If you have eaten an onion, the flavor of a shallot would not be foreign. If a yellow onion is shallot's loud-mouthed simple hillbilly cousin, the shallot is a suave, nuanced sophisticate. I wanted a vinaigrette that could tie everything together. I originally was going to use plain apple cider vinegar but I was intrigued by Silverstone's use of orange juice in her salad. Now I had the best of both worlds: the apple cider vinegar would echo the apples in the salad while providing a hint of acidity to the orange juice. This provided a second surprise to me. The flavor of the orange and the lentils were very tasty. I still am confused why that worked. Enjoy!
Brown Lentils with Grapes and Apples
1 cup brown lentils
1 shallot, minced
1 cup grapes, chopped
1 apple, cored and diced
zest of one orange
juice of one orange
2 tablespoons apple cider vinegar
1-2 tablespoons extra virgin olive oil
1/2 cup walnuts, toasted and chopped
salt and pepper (or red pepper flakes) to taste
- Cook lentils in water until tender, about 12-15 minutes. Drain and let cool.
- When cool combine lentils with shallot, grapes, apple, orange zest, orange juice, apple cider vinegar, and olive oil. Mix together until combined and season with salt and pepper.
- Let marinate 20-30 minutes in the refrigerator. Just before serving mix in the walnuts.
Monday, August 22, 2011
Ace's Adventures with . . . Peach Salsa
I noticed that when I say adventure, I really mean that I am trying something new and I have no idea how the dish is going to turn out. I had an adventure making Peach Salsa yesterday, which I have never had before. Conceptually, I like the idea of the sweet peaches with something crunchy from the allium genus and a little spicy chili pepper topping something savory. After all, I really enjoy mangoes in my Black Bean Salad, I thought I might enjoy some Peach Salsa on some fajitas. What did I learn:
- Peach Salsa is rather weird and I will not be making it again. I think chutney has more potential.
- I would not eat Peach Salsa on chips but I did enjoy the salsa with the ground turkey that was on my fajita. The flavors of the salsa and meat complement each other. If I just had vegetables, the sweetness would have been too much.
- I added some grated garlic. I knew I was taking a risk and it turned out to be a risk I should have avoided. The garlic did not enhance the salsa.
- Fresh cilantro would have helped to bring the salsa all together.
Peach Salsa, serves 3
2 nectarines or peaches, skin and pit removed
1/2 red onion, finely diced
1 jalapeno, seeds removed and minced
1-2 tablespoons lime juice
kosher salt and freshly ground black pepper to taste
Mix everything in a small bowl and let sit for 20-30 minutes before serving.
Thursday, August 18, 2011
Simple Sammies and Other Goodies
If you have never had Tillamook Vintage White Medium Cheddar, the Tillamook cheese in the dark blue package, you are seriously missing out. This cheese is velvety with a nice cheddar kick. Our favorite way to enjoy this cheese is what we call Simple Sammies. I apologize my humble picture does not do justice to the deliciousness of this sandwich.
Simple Sammies
- Slice some Tillamook Vintage White Medium Cheddar cheese. Let come up to room temperature.
- Slice some nice rolls. I suggest the hoagie rolls from the Fred Meyer bakery.
- Drizzle a little extra virgin olive oil on both cut sides of the bread, top with cheese, and season with kosher salt and freshly ground pepper. Enjoy!
We had some fresh basil from the farmer's market so we added a few fresh basil to our sandwiches. Oh my goodness, this was so heavenly we had these sandwiches for dinner two nights in a row.
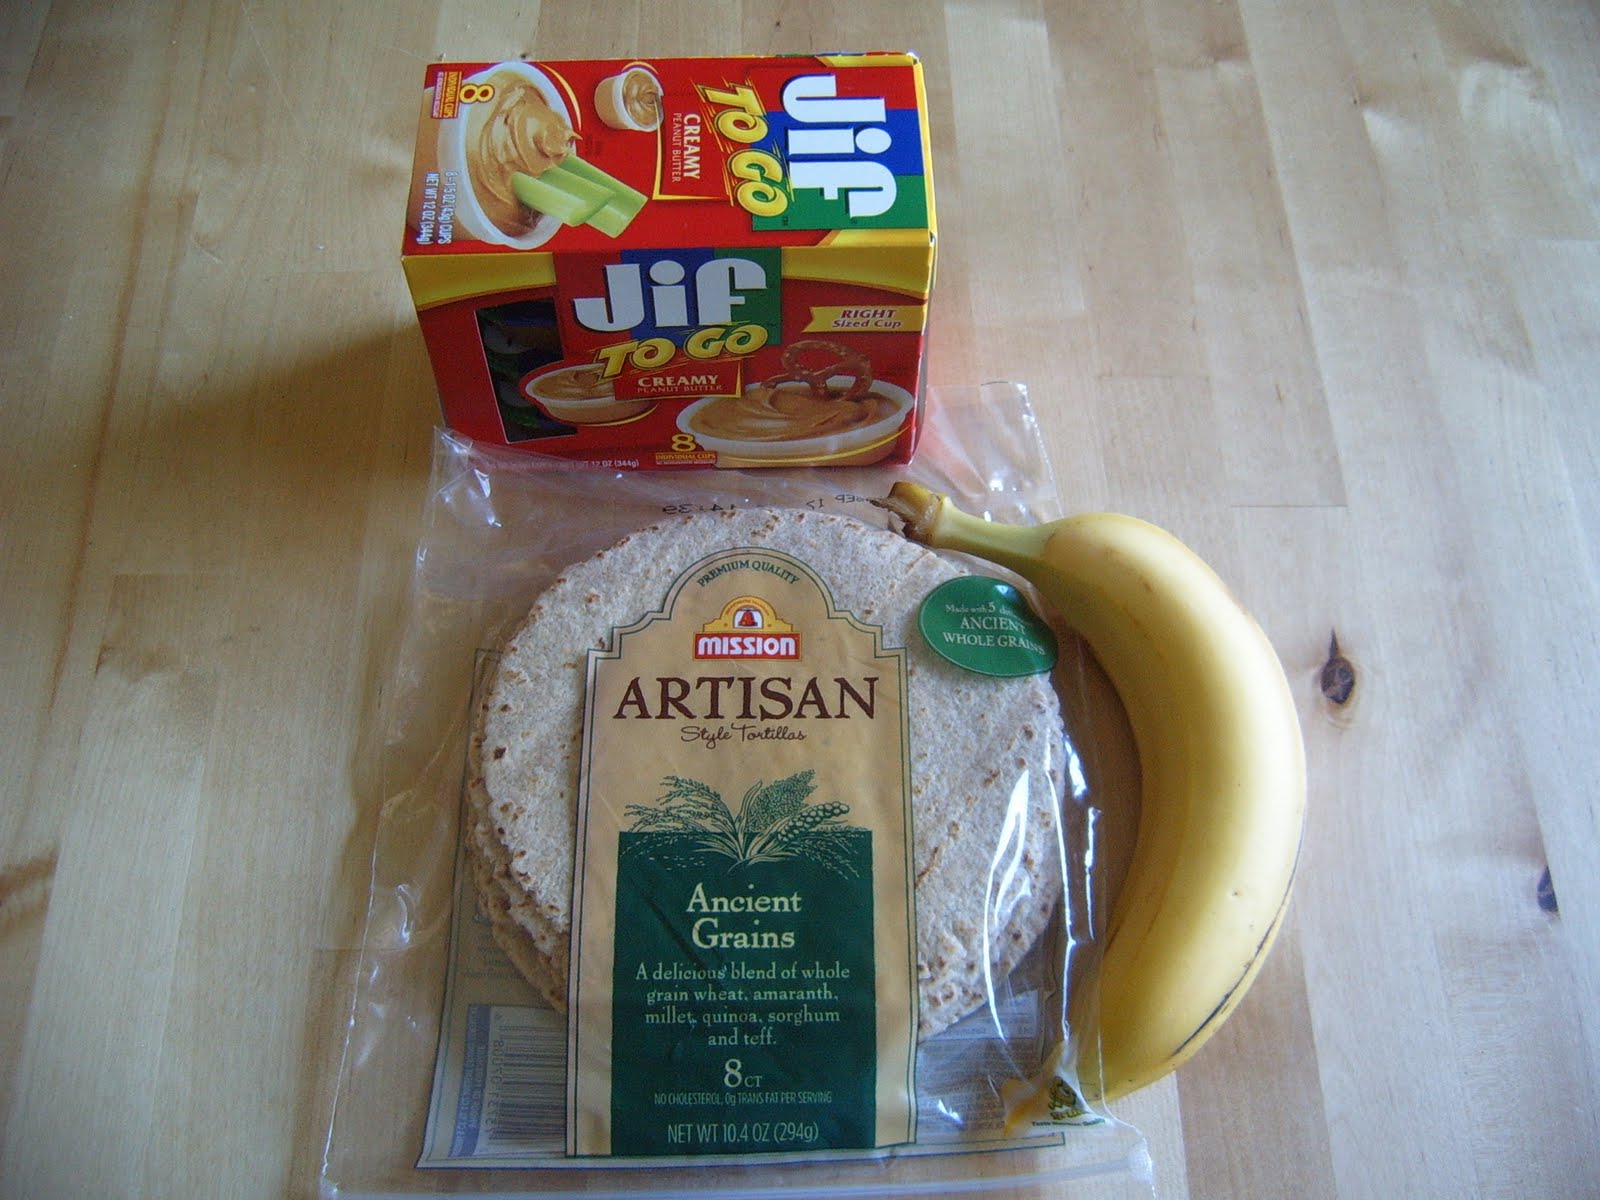
I thought I would share the snack/breakfast I have been enjoying every day for the last two weeks. I cannot even think of a name. Z. refers them as my weird banana tortilla things, but that does not quite roll of the tongue. How about Peanut Butter and Banana Tortilla Sandwich?
Peanut Butter and Banana Tortilla Sandwich
1-2 whole grain tortillas
peanut butter
1/2-1 banana, sliced *
- Preheat skillet over medium-low to medium heat.
- Spread 1 tablespoon or 2 tablespoons if a large tortilla over 1/2 of the tortilla.
- Arrange sliced bananas over peanut butter.
- Fold uncovered side of tortilla over banana and peanut butter and press gently.
- Place tortilla in skillet and let warm gently, 2-3 minutes per side.
- Cut in half for easier eating. Be careful. The peanut butter will be melted and warm. Enjoy!
Monday, August 8, 2011
Recipe Review: Flour's Famous Banana Bread
Source: Food Network
I still love this banana bread even after making it over and over these past three or so years. I have no desire to try any other recipe. This is tried and true for me. When pondering what I had to say about this bread I began thinking more about baking.
The ingredients:
When chatting about cooking, a question that often comes up is, "Are you flinger or a measurer?" Or paraphrased, the question becomes, "Can you bake?" A general observation I have made is that flingers tend to be people who have difficulty focusing on the details, they are just not interested. Flingers do not do well with authority: even recipe directions can make flingers feel like they are bossed around.
Bakers (or measures who do not bake, for that matter) have a perfectionist streak tempered with perseverance. I admire the perseverance it takes to become a decent, consistent baker. I think bakers secretly want approval. Why else would they create foods that make most of us feel so warm and fuzzy on the inside? Plus, have you seen how much people's faces light up when you mention you can bake a really good pie?
I embrace qualities of both flingers and measurers. I think like many cooks, transitions between the two are fluid and contextual. I certainly do my share of flinging, especially when it comes to flavoring my dishes. I will use a garlic mountain because it is so attractive without batting an eye or throw whatever spices from my pantry sound appealing into the pot. On the other hand, I can follow someone else's directions even though I do have trouble now and then. I have some of the perseverance of a baker. I will make a tasty dish over and over just to get the seasonings exactly the way I imagine or to adjust minor details.
While I love sharing my home-made baked goods with friends, whether it is deserts or bread, I almost always bake for myself. I love the process of baking: the measuring, the mixing, filling the apartment with warm, delicious scents, and even the waiting. I feel accomplished when I look at the original ingredients I started with then transformed into bread. There are times when this alchemy does not create golden brown morsels. I never consider this complete failure, it is one of the perils of experimenting with ingredients.
Additional thoughts on this particular banana bread recipe:
I still love this banana bread even after making it over and over these past three or so years. I have no desire to try any other recipe. This is tried and true for me. When pondering what I had to say about this bread I began thinking more about baking.
The ingredients:
| From top clockwise: granulated sugar, whole wheat flour, all-purpose flour |
| From right: baking soda, cinnamon, salt |
When chatting about cooking, a question that often comes up is, "Are you flinger or a measurer?" Or paraphrased, the question becomes, "Can you bake?" A general observation I have made is that flingers tend to be people who have difficulty focusing on the details, they are just not interested. Flingers do not do well with authority: even recipe directions can make flingers feel like they are bossed around.
Bakers (or measures who do not bake, for that matter) have a perfectionist streak tempered with perseverance. I admire the perseverance it takes to become a decent, consistent baker. I think bakers secretly want approval. Why else would they create foods that make most of us feel so warm and fuzzy on the inside? Plus, have you seen how much people's faces light up when you mention you can bake a really good pie?
I embrace qualities of both flingers and measurers. I think like many cooks, transitions between the two are fluid and contextual. I certainly do my share of flinging, especially when it comes to flavoring my dishes. I will use a garlic mountain because it is so attractive without batting an eye or throw whatever spices from my pantry sound appealing into the pot. On the other hand, I can follow someone else's directions even though I do have trouble now and then. I have some of the perseverance of a baker. I will make a tasty dish over and over just to get the seasonings exactly the way I imagine or to adjust minor details.
While I love sharing my home-made baked goods with friends, whether it is deserts or bread, I almost always bake for myself. I love the process of baking: the measuring, the mixing, filling the apartment with warm, delicious scents, and even the waiting. I feel accomplished when I look at the original ingredients I started with then transformed into bread. There are times when this alchemy does not create golden brown morsels. I never consider this complete failure, it is one of the perils of experimenting with ingredients.
Additional thoughts on this particular banana bread recipe:
- I have never added the creme fraiche or sour cream and my bread seems to turn out just fine.
- I usually reduce the amount of sugar to about 1/2 cup. I love super sweet breads but I find that this is also pleasant.
- I enjoy using a mix of all-purpose flour and whole wheat flour. Using only all-purpose flour results in a very smooth texture. I am fond of the nutty, slightly grainy texture of whole wheat. Perhaps, whole wheat pastry flour would result in a smoother crumb but I have not yet tried that. I would suggest using a mix of whole wheat and all-purpose. When I tried making a loaf of bread with just whole wheat flour and my bread was a leaden disaster. I am definitely open to suggestions and tips.
- My favorite way to mash bananas is to use a potato masher. It is a multi-use tool!
Monday, August 1, 2011
Peach Granita
After watching enough episodes of Iron Chef or Everyday Italian you are bound to see a granita. I always thought granita seemed rather silly. What could possible be special about icy fruit juice? Well, I have to admit I saw one of my favorite tv personalities make a coconut granita, the temperature was quickly rising, so I caved in and made granita. Just a can of coconut milk, a little simple syrup, and time. Delicious!
| Coconut granita! |
Peach Granita, serves 3-4
2 peaches, skin and pit removed, chopped
1/4 cup simple syrup, or to taste
1/2 cup water
- Blend peaches, simple syrup, and water in a blender until smooth.
- Pour in a dish and place in freezer.
- Every 20-25 minutes, remove from freezer and stir thoroughly, breaking up all ice crystals. Return to freezer and continue process until completely frozen, about 3-4 hours.
| Granita just about to go in the freezer. |
- Every time you stir the granita, break up all the chunks of ice. I used a fork to scrape the sides and gently smash all the frozen pieces each and every time. This will result in a smooth consistency.
- To peel the peaches, cut an 'x' into base of the peach. Gently place in boiling water, up to one minute. Immediately remove and place in a bowl of cold water. When cool enough to handle, peel.
- To make simple syrup combine equal parts sugar and water in a saucepan and bring to a boil. The sugar will dissolve and you are left with a sweet syrup. I suggest simple syrup for recipes like this so the granita is smooth and not granular.
Monday, June 27, 2011
fruit crisp
I am on a mission to become a better cook and that sometimes mean experimenting and trying out new recipes. Even though I make some dumb mistakes sometimes (like over-baking cookies!), I still want to share what is going on in my little kitchen.
This is where Cobbler Attempt #1 comes in. When having guests over for dinner, I prefer to make a baked desert. One, this means I will not be eating a whole desert by myself and two, baked goods are warm and inviting. Z. and I had another couple over for dinner the other night. Z. made his super yummy yakisoba and I tried contributing an apple cobbler.
I think it is time to expand my horizons. I have made my fair share of fruit crisps but never a cobbler. The only difference I can tell between a cobbler and a crisp is the topping. Cobblers have more of a biscuit or pie-type crust and a crisp has a crumbly topping.
My first try at a cobbler turned out alright, I learned a few things about making a cobbler crust and encountered a few questions but first the recipe I used this time.
Apple Cobbler, adapted from The Cobbler Crusade by Irene Ritter
Filling (or the bottom layer):
2 to 3 apples, peeled and sliced
3 tablespoons sugar
1/2 teaspoon cinnamon
pinch of salt
1/2 cup warm water or apple juice
1 tablespoon corn starch
1 tablespoon canola oil or butter cut into small pieces
Biscuit Crust:
1-1/2 cups all-purpose flour or a combination of all-purpose flour and whole wheat flour
2 teaspoons baking powder
1/4 cup granulated sugar
1/2 teaspoon cinnamon
1/4 teaspoon salt
1/4 cup canola oil (if using oil, may need 1-2 tablespoons water) or 1/2 cup milk (suggested)
- Preheat oven to 425 degrees Fahrenheit and spray a 9-inch square baking dish with non-stick spray.
- In a large bowl, combine the sliced apples, sugar, cinnamon, and salt. Make sure apples are thoroughly coated. Pour apples into prepared baking dish. Set aside.
- In a small bowl combine 1/2 cup warm water or apple juice with 1 tablespoon cornstarch. Mix thoroughly. Pour into baking dish with apples.
- Drizzle oil over top of apples or scatter pieces of butter over apples. Set aside.
- In another large mixing bowl, combine all the crust ingredients until well mixed.
- Spoon dough on top of apple filling, covering the apples.
- Bake 20 to 25 minutes, until crust is done. Serve warm or room temperature.
| Apples! |
| Filling ingredients minus cornstarch and water |
| Whole-wheat flour (left) and all-purpose flour (right) |
| The rest of the topping ingredients |
Changes I will be making to Cobbler #2:
- As I was eating my cobbler, I was pondering how nice thick slices of apple would have been. I realized when making a fruit crisp I have always cut my apples or pears very thin and peaches rather thickly to enjoy their succulent flesh. Why not cut thick slices of apple?
- I used equal parts all-purpose flour and whole-wheat flour. The recipe I was using told me to look for a golden topping but in my experience, whole-wheat flour does not change color the same way white flour does. I could have taken the cobbler out of the oven after 20 minutes and had a lovely and fully cooked beige topping. Alas, I second-guessed myself and left the cobbler in the oven for 4 more minutes. The crust was fine, just not as perfect as I would have liked but the next day, I did not notice the over-doneness at all when eating the leftovers.
- The Cobbler Crusade said I could use 1/4 canola oil to bind the topping ingredients together. Great because I did not have milk! The mixture was very dry and not clumping so in a slight panic I added 1-2 tablespoons of water. I will have to investigate this further but I do know that the milk would help make a flakier crust. There are pros and cons to both.
- I am a dork and made the crust completely even. When the recipe mentioned creating a cobblestone effect with the dough, I got a little lost. I have seen cobblers before and happily eaten them but are those separate islands of biscuit the cobblestone effect?
- Any tips or suggestions to aid me in my own cobbler crusade?
Monday, April 4, 2011
Sincronizada Pacific Northwest-Style
My understanding of authentic Latin food is very limited but I have learned that one of the features that sets a sincronizada apart from a quesadilla is that a sincronizada uses two tortillas to sandwich tasty fillings. A quesadilla, on the other hand, features a tortilla folded in half. So, I decided to call my snack sincronizada.
I drew inspiration from the cheese sincronizadas that have seemed to become a staple the last couple of weeks thanks in part to a recent sale on shredded cheese to create a variation of one of life's simple joys: pear or apple slices topped with a piece of sharp cheddar. The creation of my Sincronizada Pacific Northwest-Style began just like many dinners, I sprinkled some cheddar cheese on a corn tortilla while a small skillet sprayed with non-stick cooking spray heated up over medium. Then, the process took a pleasant turn. I placed pear slices, about one-fourth of a pear, in a single layer over the cheese, sprinkled a tiny bit more cheese over the pears, and seasoned with freshly ground pepper and kosher salt. The salt and pepper really made the pear sincronizada special. Lastly, I topped the pears with a second tortilla, placing the delicious package in the warm pan. I toasted each side until the tortilla was slightly golden, a few minutes each side, very carefully flipping the sincronizada over. Enjoy!
Subscribe to:
Posts (Atom)