Pages

Thursday, September 29, 2011

White Bean and Vegetable Stew


Simple and homey are two words I would use to describe my White Bean and Vegetable Soup. Plenty of carrots, celery, and onion add lots of flavor while the buttery white beans add a hint of sweetness and creaminess.

If you take a stroll through the bulk section of the grocery store (or, if you are Winco, pummel) you may see multiple varieties of beans that are white with many different names, such as white kidney beans, cannellini beans, fazolia beans, navy beans, haricot beans, and Boston beans. Any of these would work for this recipe. Some of these names describe the same beans. My preference is to use navy beans. My palate is not refined enough to tell the difference between the flavors but I do like the texture and size of the navy beans for this stew.

Canned beans can easily be substituted for dried beans. I do love the ease of canned beans in most recipes. If you using canned or dried beans, I would still let everything simmer for a period of time. 3-4 cans of drained and rinsed beans may be used in place of the dried beans.

I use vegetable stock but plain, old water would work just as well. Chicken stock would be a tasty substitution. A combination of stock and water could also be used to add the flavor the stock while keeping the cost down.

I enjoy my bean soup to be extra thick and chunky, hence I named it a stew. If you would like something with more of a soup consistency, please add more liquid.

My favorite herb to pair with white beans is rosemary. The earthy, pine flavor and scent balances the sweet, mellowness of the white beans. I just did not have any rosemary on hand, otherwise it would have made its way into the soup pot.

I think the cayenne pepper is an important element. I do not add enough to make the stew spicy, I just add enough to balance the sweetness of the vegetables and beans. How much cayenne is needed to accomplish this and is very personal so I would let each person season their own bowl to taste.

P.S. This stew freezes very well and can easily be doubled. The recipe makes enough soup to feed me for two days plus leftovers for the freezer. Enjoy!


White Bean and Vegetable Stew

2-3 tablespoons olive oil
1 yellow or white onion, diced
3-4 carrots, peeled and diced finely
3-4 stalks celery, diced finely
4-6 cloves garlic, minced
2 cups dried navy beans
6 cups vegetable, chicken stock, water or a combination, more as needed
Kosher salt
Freshly ground black pepper to taste
Ground cayenne to taste
  1. If desired, soak the dried beans overnight. Change the water several times. 
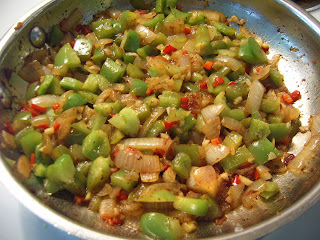
  2. Heat the olive oil over medium-low heat in a large stock pot. Add the onion, season with lots of black pepper, and cook until soft, about 15-20 minutes, stirring occasionally.
  3. Add the carrots, celery, and garlic. Cook until tender, about 10 minutes, stirring occasionally.
  4. Add the beans and liquid, and stir to mix. Bring the mixture to a boil then turn the heat down to medium-low and let simmer 1 1/4-1/34 hours, until the beans are tender.
  5. If desired, place 1/3 of the soup in a large bowl and carefully mash with a potato masher or use a food processor (please, be careful when processing hot food) until the mixture is chunky. Add back to the pot and mix. Simmer another 10 minutes then serve.

Saturday, September 24, 2011

Cheap Tip Saturday 9/24


Cheap Tip: Make Your Own Popcorn

The popcorn in the bag, while convenient, is not matched by the cheap price and tastiness of bulk popcorn. Growing up I only knew the delight of microwaved popcorn. I was always slightly envious of my friends who had an air popper. The loud, hot air that could transform jumping kernels into fluffy puffs of popcorn seemed magical to me. Last year, Z. and I bought our first appliance together: an air popcorn maker. I got the cheapest model when it was on sale. Prior to this, $15 seemed like way too much money to spend on something that will perform only one task. Considering we can always get high-quality popcorn at the Market of Choice for $0.89/pound for conventional kernels and when on sale, $0.99/pound for organic kernels (definitely worth the extra money!). When a big bowl bowl of popcorn requires 1/4 cup of kernels, the $15 appliance is well worth the money.

All through college, before I had my precious popcorn popper, I made popcorn on the stove. I would heat a high-sided saucepan over medium heat with a tablespoon or two of canola oil. I would pour my popcorn kernels into the pot. I would place the lid on the pot and leave the stove, shaking the pan occasionally and much more frequently once the kernels start popping. I liked to pull the pan off the heat when there was only one or two kernels popping at a time and there was a pause between explosions. I would keep the lid on for another minute or two because I knew a stray kernel would pop. This popcorn had to be eaten right away due to the oil and would not make good leftovers.

Plain air-popped popcorn on the other hand does make a tasty snack later. Just remember to put it in an air-tight container when it is cool, unless of course, you enjoy stale popcorn.

Variations I enjoy:
  • Popcorn and Olive Oil. I love popcorn drizzled with extra virgin olive oil seasoned with some kosher salt. Paula Deen will be disappointed in me. I prefer olive oil to butter on my popcorn.
  • Popcorn with Rosemary Infused Olive Oil. Over the lowest heat, warm the amount of olive oil you plan on using, about 1 to 2 tablespoons olive oil. Add one tablespoon dried rosemary. There should be no sizzling; you are just gently warming the olive oil. Allow to steep for 10 or so minutes. Pour the olive oil and rosemary through a fine-mesh strainer, discard the rosemary, drizzle the infused olive oil over popped popcorn, and sprinkle kosher salt over the top. 
  • Popcorn with Nutritional Yeast.Nutritional yeast can be found in the bulk section of natural foods stores (or Winco, for that matter). I was introduced to this variation of popcorn by some Eugene-hippies that I was hanging out with. This recipe is all that I remember of them. Nutritional yeast sounds scary but is actually quite tasty with a nutty flavor that reminds me of Parmesan cheese. In fact, nutritional yeast is generally a featured ingredient in vegan cheese substitute recipes. If you are from Wyoming and reading this, please do not let all this talk of hippies and vegan foods deter you from trying nutritional yeast. The picture at the top is a delicious bowl of popcorn with olive oil and nutritional yeast. To enjoy nutritional yeast and popcorn I drizzle olive oil over my popcorn. Then, I add nutritional yeast and kosher salt to taste.
  • Ranch-a-Corn. This is not for everyone. Either you love the flavor of ranch or you do not. I, of course, do love ranch. To make this variety of popcorn, you will need powdered ranch dressing mix. For a big bowl of popcorn, made with about 1/4 cup kernels, you will need 1-2 tablespoons ranch mix. Take it from me, too much of the mix is not desired. It is way too easy to breathe the stuff in when trying to eat the popcorn.
  • Grated Parmesan or Asiago cheese. Need I say more?


Thursday, September 22, 2011

San Francisco Vacation


I strongly believe traveling is one of the best things a person can do for themselves. Traveling always changes me in ways that I cannot quite explain. I think the most powerful force is seeing that there is a whole world bustling along outside of my quiet little universe. I get into a routine of work, play, and cooking, preoccupied with worries and reaching my goals that I tune out the world. Visiting someplace else, particularly a major city, is a nice reminder that I am not at the center of the universe.

There is no substitute for experiencing a place firsthand. A city is more than just some famous landmarks and buildings. The air, smells, grime, sounds, and changes in light are just a few of the variables that create an experience.

And, we cannot forget the food. Trying new foods is one of my favorite parts of traveling. Neither Z. nor myself had ever been to San Francisco. We had two places we really wanted to try: Blue Bottle Coffee and 21st Amendment Brewery. Our Market of Choice carries a few varieties of beer brewed by 21st Amendment Brewery and we have thoroughly enjoyed those so we were looking forward to trying the beer closer to its source. Their IPA is one of the best IPAs I have ever had. Unfortunately for us, the brewery is located in the vicinity of AT&T Park. There were sporting events both days we were available to visit the brewery so we did not go in the brewery but we did walk past it and peer in!


Blue Bottle Coffee came highly recommended to us by a friend who lives just outside San Francisco. We were not disappointed! Blue Bottle served one of the best Americanos I have ever had (the Americano from the Wandering Goat of Eugene is still my favorite). The coffee was a rich shade of mahagony with a layer of crema floating on top. The taste was dark and incredibly smooth. We always visited the Blue Bottle in the Mint Plaza. I fell in love with this location. You walk into a space that is elegant and simple, very understated. The whole place was geared to one thing: serving a great cup of coffee. The enormous windows let in lots of soft light while the vintage-looking crown molding lining the ceiling provided additional architectural interest. The color scheme of soft gray and white contrasted nicely with the dark wooden floors, creating a sophisticated atmosphere. I saw no syrups, pumps, or drinks with silly names that I would be too embarrassed to order.

Around the corner from this particular Blue Bottle Coffee was a Vietnamese sandwich shop. I am not even sure if this place had a name. We ate there twice. Z. and I both thoroughly enjoyed the bánh mì. We discovered this place shortly after arriving in the city. We emerged from the underground subway near our hotel and immediately began roaming the streets looking for a place to eat. The sandwich shop was the first place we found that fit the two criteria we had for all our meals: 1) It sounds good and 2) we cannot get it at home.

 
If you have never enjoyed bánh mì here is what I think makes a bánh mì special:
  • For me, bánh mì exemplifies Vietnamese cuisine with its focus on fresh ingredients that have contrasting textures and flavors.
  • The bread. Each sandwich is made from its own individual loaf that is the Vietnamese take on the French bagette. The crust is rather chewy while the interior is light and soft.
  • The meat. Pork seems to be the predominant and most prevalent topping. My favorite combination is cold cuts, such as steamed pork with pâté. The earthy, minerally quality of the the pâté complements the sweet steamed pork. Z. had what looked like grilled, uncured bacon. He loved it! The other options available were vegetarian, grilled pork, and grilled chicken.
  • Pickled vegetables, usually pickled carrot and daikon radish. These provide great crunch and acidity. Sometimes, as in the case of the veggies on our San Francisco sandwiches, they were also a tiny bit sweet. What a delicious combination of crunchy, sour, and sweet!
  • Mayonnaise. As far as I know, there is always mayonnaise or butter on the bread. Spreading mayonnaise on a sandwich that already has pork pâté may seem odd but it works. The mayonnaise with the pâté topped with the pork provides a delightful unctuousness that is cut by the pickled vegetables and bright cilantro.
  • Garnished with chili pepper and sprigs of cilantro. I love chiles and the varieties of peppers that have always been on my sandwiches. They are flavorful and spicy without being overwhelming. 
We also ate at an Indian restaurant called Bindi. Pleasant and a great choice but the main dishes were nothing spectacular. We had chana masala (Z.'s version is way better) and paneer tikka masala. This is the second time I have had tikka masala in the last few months. The combination of spices, yogurt, and tomato is wonderful. I am looking forward to learning how to make my own tikka masala. If you do go to Bindi, I highly recommend the garlic cilantro naan.

We also partook of some delicious charcuterie from Boccalone located in the Ferry Building in the Embarcadero neighborhood. We were reeled in by words, "Tasty Salted Pig Parts" on the sign. We enjoyed a platter of mortadella, pancetta, and capocollo which was served with some thin, crispy bread sticks and cured olives. Delicious!

San Francisco surprised me in a few unexpected ways that I would like to share.
  • I knew the San Francisco Symphony and Opera would be amazing but finally hearing them in person was life changing. The strings had a tough, focused string sound that was unbelievable and inspiring. 
  • Architecture. The buildings were amazing. There were the big, imposing skyscrapers that grace any big city. I loved the older buildings with their interesting architectural details and variety in colors. The opera house, symphony hall, one of the theaters, and city hall were all clustered near other creating an imposing and grand scene.
  • Doughnuts. I could not believe how many doughnut shops there were or how many restaurants served doughnuts, including the sandwich shop where we ate bánh mì. 
  • Chicken shops in Chinatown. As we strolled through Chinatown I saw several shops that only sold raw chicken or chicken parts. I had no idea that chicken was so prized.
  • Polite panhandlers. 
  • The cable car was awesome! This is a great way to get a view of the city. The first time I saw on the bench that looks out of the cable car while Z. stood on the outside platform. I really enjoyed the trip but Z. was on cloud 9. The next time, I also rode on the platform. If you ride the cable car, ride on the outside, it is a totally different experience!

Saturday, September 17, 2011

Cheap Tip Saturday 9/17

Cheap Tip: Be frugal with a purpose. Save your money so you can spend it on really worthwhile things, like travel.

Currently, the Cheap not Frugal Eats duo is thoroughly enjoying themselves in San Francisco. We are taking a weekend trip to see Yo-Yo Ma perform with the San Francisco Symphony, as well as see the San Francisco Opera perform Puccini's Turandot. Goes to show that being frugal or cheap reaps rewards.

Thursday, September 15, 2011

Dinner for One: Stovetop Tuna Noodle Casserole


I have a confession. I would occasionally purchase and make Tuna Helper the first few years I lived on my own. I know, what was I thinking? Well, I had lots of canned tuna and knew only one recipe: tuna salad sandwiches. Just a couple months after I left home a package containing 40 cans of tuna went on sale. My father and sister bought me one of these packages and shipped it to me all the way in Oregon. And, Zachary gets mad at me sometimes for my lack of common sense...

I still only know how to make one tuna dish: tuna salad sandwiches. Every once in awhile, I get really crazy and make a tuna melt. I am on a quest to find more uses for canned tuna since this is a staple in my pantry. Of course, tuna noodle casserole was the first dish that came to mind. I wondered what a homemade version would taste like. Turns out, homemade tuna noodle casserole is rather tasty. Here is what makes my Stovetop Tuna Noodle Casserole so tasty:


  • Lots of vegetables. I kept things pretty simple but there is lots of room for creativity in this area.
  • Sour cream provided a mild tang and a feeling of richness.
  • Dijon mustard is packed with flavor. Two teaspoons adds a hint of flavor without being the star.
  • Using only 1 can of tuna provides plenty of protein without making the home smell like cooking tuna.
  • Do not forget the cayenne! I added enough cayenne to feel but not make the dish spicy.
I did not provide the traditional crunchy or cheesy topping. If you would like this, I would suggest after you have gently mixed everything together in the pan, carefully pour the pasta mixture into a casserole dish and sprinkle with either toasted bread crumbs or cheese of your choice. Place under the broiler until golden or bubbly. Enjoy!

Stovetop Tuna Noodle Casserole, serves 2

1 1/2 cups rotelle pasta
1 5 oz. can chunk light tuna, drained
1-2 tablespoons olive oil
1 small onion (or 1/2 large onion), diced
1 cup sliced mushrooms
3-4 cloves garlic, minced
1 carrot, diced finely
1 stalk celery, diced finely
1 cup sour cream
1/2 cup milk or 1/2-and-1/2
2 teaspoons Dijon mustard
freshly ground black pepper and salt
cayenne pepper to taste
  1. Prepare pasta according to package directions. Under-cook by one minute. When finished cooking, drain, and set aside.
  2. In a separate bowl, combine sour cream, milk or 1/2-and-1/2, and Dijon mustard. Set aside.
  3. Meanwhile, heat olive oil over medium-low in a large high-sided skillet. Add onion and mushrooms; season liberally with salt and pepper. Cook until onions are soft and translucent, about 10 minutes; stirring occasionally.
  4. Add garlic, carrot, and celery; stirring occasionally. Cook until vegetables are tender, about 5 minutes.
  5. Turn heat down to low and add sour cream mixture, tuna, and pasta. Gently mix and season liberally with salt, pepper, and cayenne pepper to taste.Allow everything to warm through then serve.


Saturday, September 10, 2011

Cheap Tip Saturday 9/10


Cheap Tip: Delicious french bread from Jimmy John's.


Z. and I have been enjoying delicious Simple Sammies made with Jimmy John's french bread that Z. bought for a mere fifty cents a loaf. Who would have thought to stop by a fast food restaurant for yummy bread? Enjoy!

Monday, September 5, 2011

Semi-Homemade Bacon Pizza


College football started on Saturday. Thank goodness it is finally here! One of the unique quirks of Corvallis, Oregon is the overwhelming zeal and interest most folks take in Oregon State football. I had no interest in football whatsoever until I moved to Corvallis and now watch the Oregon and Oregon State games so I have some understanding of what (some) folks are ranting and raving about. Z. and I enjoyed a semi-homemade bacon pizza while watching the first Oregon game of the season.

This pizza is simple. Basically, you take a frozen pizza and add toppings to it. We have been making pizzas like this for years. Cheap Tip #54: Having a long-distance sweetheart is not frugal (ask Z.). Yes, we were long distance for three years. When we saw each other we wanted to do something nice for dinner but when you have to have a separate budget for gas just to see the other person, we could not always go out for dinner. Z. and have always loved pizza and came up with an idea to make a basic, cheap pizza a little more special. The first time we made this pizza we went on an adventure just to find thickly-sliced peppered bacon. That pizza was well worth the effort that went into it. We loved bacon pizza even before we knew of the existence of American Dream's bacon pizza!


Why not make a pizza from scratch? Neither one of us is great with yeasted breads. I can make my own version of naan but it is still a challenge for me. Neither one of our several, tiny apartment kitchens were conducive to rolling out a pizza. Even now, we do not have the counter space for this kind of endeavor. Plus, the sale price of our preferred brand costs less than making a pepperoni pizza for ourselves would.


The topping selections are endless; just use your imagination. We have found that we like to start with a pepperoni pizza and add:

 Here is a basic outline of how to make a jazzed-up frozen pizza. Enjoy!

Semi-Homemade Bacon Pizza
  1. If using bacon, cook until browned. Set the bacon aside while reserving the bacon drippings.
  2. Cook vegetables until soft. If using onions, cook onions first, about 5-7 minutes then add shorter cooking vegetables like peppers and garlic.
  3. Meanwhile, preheat oven according to the directions of the pizza.
  4. Cook pizza about 10 minutes. 
  5. Spread cooked vegetables evenly across the pizza and top with extra cheese if desired.
  6. Return to oven and continue baking until done.


Saturday, September 3, 2011

Cheap Tip Saturday 9/3

Cheap Tip: Keeping a List of What is in the Pantry


Having a well-stocked pantry (well, and knowing how to use those ingredients but that is another matter) is one key to cheap cooking. An important aspect of maintaining a well-stocked pantry is replenishing the pantry when the prices of the item is at its lowest price point. Z. and I regularly eat a number of canned items (tomatoes, tomato sauce, a variety of beans, and tuna for myself) and a handful of different grains. Living in a small space, our pantry is spread out over a few kitchen cupboards and a hallway closet. When everything is tucked away we cannot easily see how much of a particular item we have. To help solve this problem, we started making a list of our stock with the amount when we would reorganize the pantry. This worked fine but the list would eventually make its way to the recycling bin. Then one of us had the bright idea to tape the list to the inside of the cupboard door. I was very proud of us! We make a mark every time we remove one of the items from the cupboard. This way, we have an idea as to how much of the item we have been using lately to help use decide  how much to stock up. In addition, we tend to forget something is in the pantry if we do not use if very frequently; the list is a great reminder.


P.S. Do not forget to write the expiration date where you can easily see it.

Thursday, September 1, 2011

Ace's Adventures with . . . Brown Lentils


Sometimes I get an idea stuck in my head that I just cannot shake. I started thinking about a salad of brown lentils and grapes some time ago. I have no idea where this came from but I had to have lentils and grapes at the same time. I imagine some of this obsession stemmed from seeing countless Waldorf salad recipes and grapes were on sale recently. While I do enjoy Waldorf salad occasionally, the flavor is slightly bland. My favorite part is the nutty walnuts with the sweet grapes and crisp apples.

During my time of lentil/Waldorf salad reflection, I was looking through Alicia Silverstone's The Kind Diet (which by the way has a number of awesome recipes which I will duly review) and she includes a recipe for lentils with raspberries and orange juice among other ingredients. Maybe my lentil and grape idea was not so far-fetched after all.

Having never had lentils and fruit together before, let me tell you, I have been missing out! I am sure Puy lentils would be even better but I used homely brown lentils. Brown lentils have a mellow earthiness that complemented the sweetness of the fruit. The depth provided by toasting the walnuts and their nuttiness was an excellent addition. Shallots are just plain delicious and complement almost everything and added a savory component. I cannot describe the flavor of a shallot. If you have eaten an onion, the flavor of a shallot would not be foreign. If a yellow onion is shallot's loud-mouthed simple hillbilly cousin, the shallot is a suave, nuanced sophisticate. I wanted a vinaigrette that could tie everything together. I originally was going to use plain apple cider vinegar but I was intrigued by Silverstone's use of orange juice in her salad. Now I had the best of both worlds: the apple cider vinegar would echo the apples in the salad while providing a hint of acidity to the orange juice. This provided a second surprise to me. The flavor of the orange and the lentils were very tasty. I still am confused why that worked. Enjoy!


Brown Lentils with Grapes and Apples

1 cup brown lentils
1 shallot, minced
1 cup grapes, chopped
1 apple, cored and diced
zest of one orange
juice of one orange
2 tablespoons apple cider vinegar
1-2 tablespoons extra virgin olive oil
1/2 cup walnuts, toasted and chopped
salt and pepper (or red pepper flakes) to taste
  1. Cook lentils in water until tender, about 12-15 minutes. Drain and let cool.
  2. When cool combine lentils with shallot, grapes, apple, orange zest, orange juice, apple cider vinegar, and olive oil. Mix together until combined and season with salt and pepper. 
  3. Let marinate 20-30 minutes in the refrigerator. Just before serving mix in the walnuts.